Tuesday, 15 February 2011

Coin Purse Tutorial

I've been busy making notebook covers and matching (or contrasting!) purses for gifts this week.


Half way through sewing one of the purses, I found myself wishing I'd worked out a long time ago, how to do a zippered pocket. So before I started sewing up the second purse, I got my camera out and took photos of all the stages to make a tutorial. I wasn't too sure how to describe the pieces, so I hope the photos speak for themselves.

Here is the tutorial for making a coin purse with an inside zippered pocket: http://www.flickr.com/photos/zedster01/sets/72157626049445520/

Monday, 14 February 2011

Texture felt bag...update

I've added a loop and button fastening to my small texture felt bag. I hand spun some thick yarn in the same colours as the bag, using merino and some 'fancy fibres', then I plyed it and felted it by wetting, soaping and rubbing.
When it was dry, I chose the part I wanted to use then positioned it on the bag and fixed it in place by sewing with regular thread. I then covered the sewing with a piece of felt and blanket stitched it into place. The button is one I hand made from fimo a while ago.

Saturday, 5 February 2011

Felt Bags

About a year ago, I tried making a felted bag using the Textured Felt method and a bubblewrap resist. I really loved the results:


But I couldn't think of how to attach a strap to it without losing the fancy fibre tassles I'd felted into the sides, so it's been lying neglected in a box for a while. I finally gave in, and recently I snipped the tassles off and attached a strap:


I made a larger bag using the same method a few weeks ago. I haven't attached a strap yet, because I'm hoping to make a felted one, I might even try using the same method, though the thought of trying to sew 2 very long straight lines is a bit daunting :)


I took lots of photos while I was making it, and have added a picture tutorial with descriptions to flickr. The sewing does take a while, but it's a good excuse to sit down with a hot drink and a film :)

Sunday, 9 January 2011

More Lamp Shade Covers

I recently bought myself a set of 4 table lamps. After making the felted lampshade cover for my ceiling light, they looked a bit plain, so I decided to make covers for those too. The first one I made was another felted one. This turned out a little thicker than the green because of the silk top and silk noil I added, but I still like it.

I've only finished another two so far, a blue and a brown. I did these a little differently, and used fabric to cover them instead. I bought some remnants a while back, and used one to make a book cover. Sew-Fantastic on flickr told me that it was a Vera Bradley fabric. It turned out to be a misprinted 'seconds' of her Peacock fabric, but looking through flickr, I realised I'd bought at least 3 different Vera Bradley fabrics and my 2 favourite were perfect for lampshade covers.


Now I just have to find time to do the white felt piece for the last lamp shade :)

Saturday, 11 December 2010

Felt Lamp Shade

Hello :)
Sorry I haven't posted recently, I just didn't have the time for felting for a while and then lacked inspiration and motivation.
I spent ages recently trying to find some nice lamp shades, but wasn't impressed with any I saw. So I just ended up buying some very plain ones. I love the way the vessel I made for my girlfriend looks when there's a tealight inside, so I decided to try to make my own shades with felt and hoped they'd look as good.
I made a piece of felt by laying out two fine layers of merino, then a fine layer of curly wools and locks (angora, wensleydale, mohair, bluefaced leicester) then a top layer of fine merino and finished off with silks, ramie and bamboo.

I made a template from the lampshade I'd bought and wanted to cover, and cut out the shape I needed from my felt. I blanket stitched around the edges, then sewed the two seems together. It fits snuggly over the top of the shade, and looks great when the light is shining through :)


For a quick guide on how to make one, visit my flickr page

Thursday, 10 June 2010

Experimenting

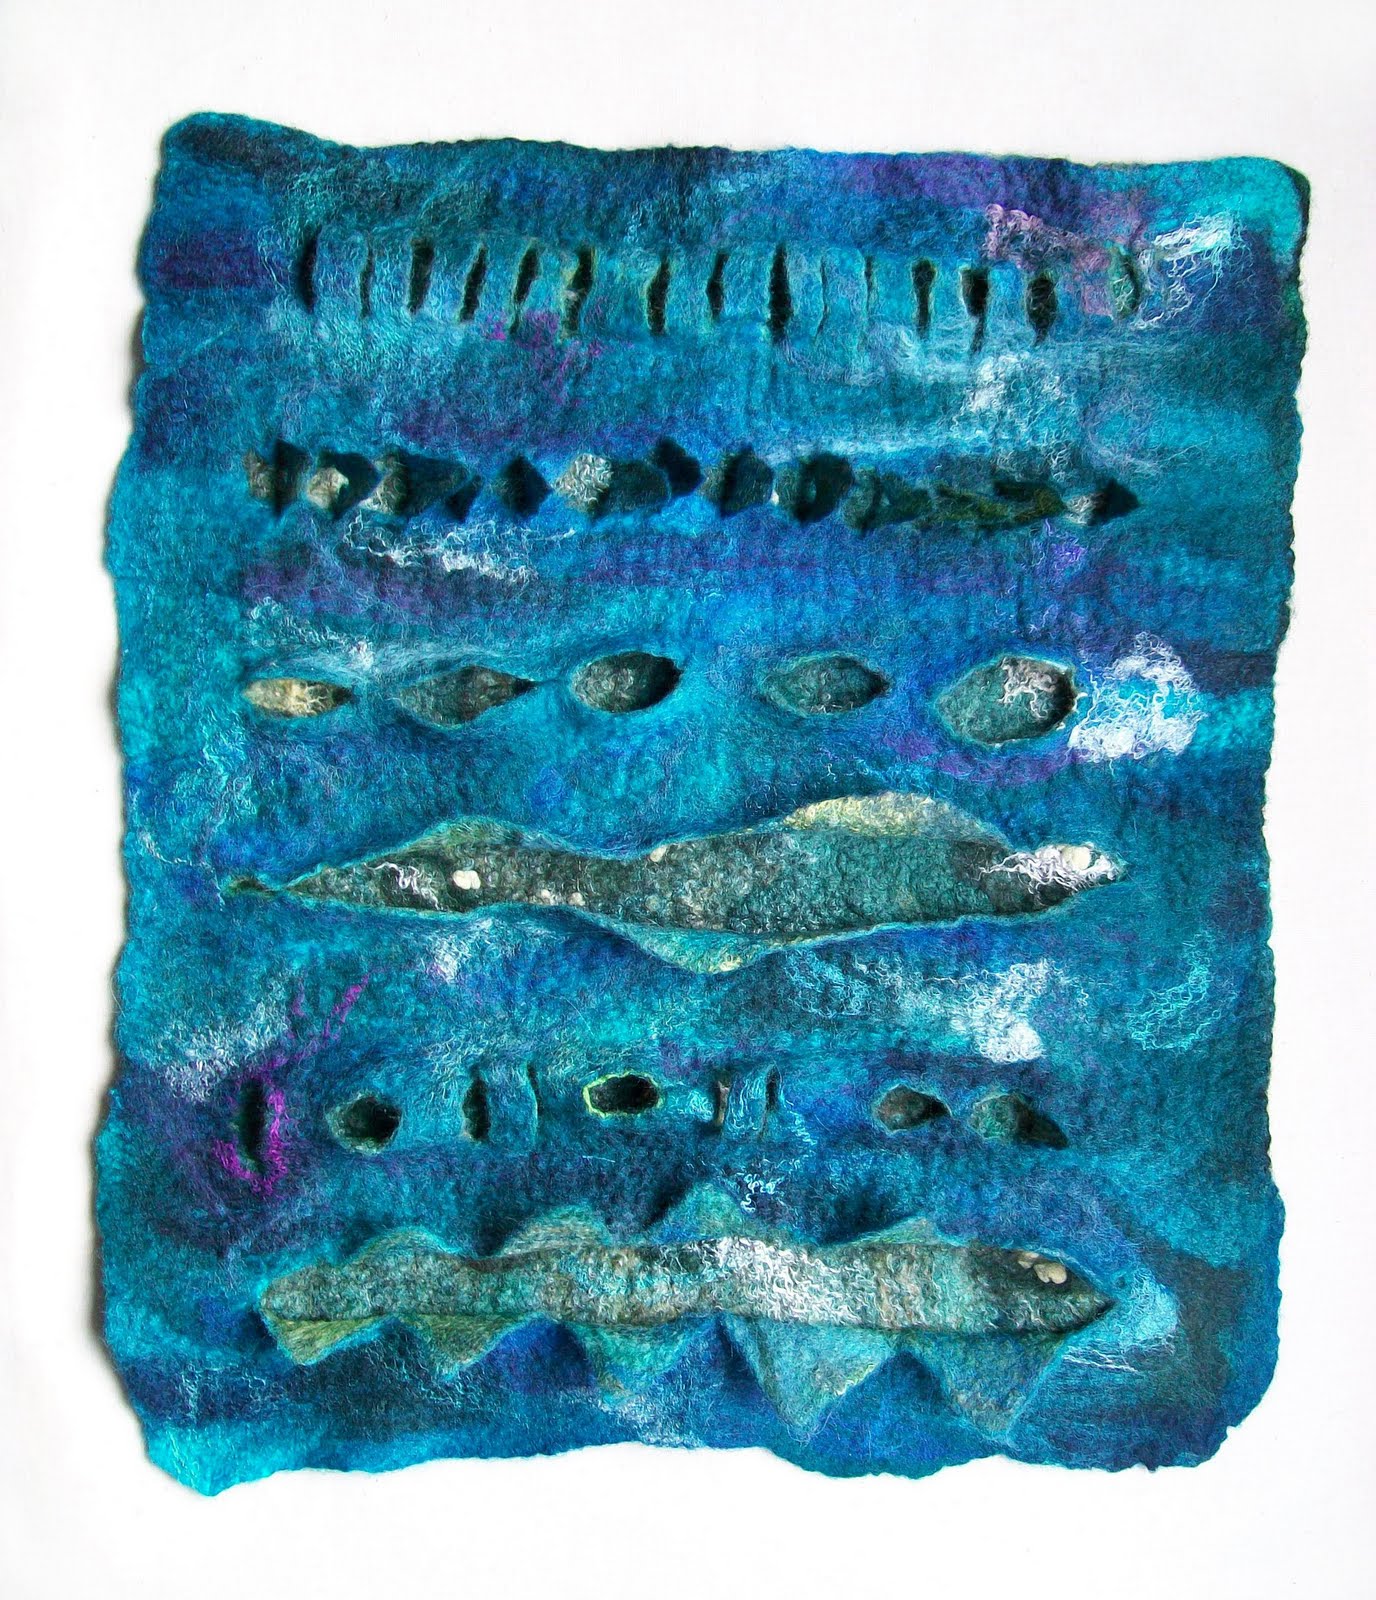
I'd been meaning to try and work out some ideas I'd had for a while, when this piece by viltalakim inspired me to start experimenting. Using strips of plastic from supermarket carrier-bags as resists, I made this piece of felt by sandwiching the resists between layers of felt and then cutting the top two layers and peeling back to reveal the felt underneath :


I used other fibres such as silk top, silk noil, soya fibre and bamboo on the layers that would show, to get the look I wanted.
Once I'd tried simple wavy cuts, I wanted to try out a few different ones. On this piece, the cuts are (from top to bottom) vertical cuts; diagonal cuts (the felt 'flaps' were then lifted up); thin slices cut off horizontally and the holes stretched; a wavy cut; a mixture of horizontal and vertical and lastly zigzags.


This burgundy piece was made the same way as the first one, but I used a resist on the back aswell, to create a channel for a dowel or similar for hanging.


It took me a while to get round to it, but a couple of days ago I used what I'd learned to make this felt danglie:


It took about 3 hours to lay out the wool tops, silk and plastic strips, and felt it. Then after a bit of a rest, the cutting and shaping took about another hour. Seemed like I'd never finish, but I'm pleased with the results

Wednesday, 9 June 2010

Placemats, coasters and trivets

A few months ago, I made a placemat and coaster set from a thick piece of felt that hadn't worked out as I'd wanted it to


I was really pleased with the results, so when I was looking through all my natural coloured wools and wondering what I could make a big piece of felt for, I decided on placemats and coasters, and made two sets:

                                          
A few weeks ago, I had my 2nd attemp at using prefelt...the first being the piece that didn't work out which then became a placemat and coasters :)
Learning from the mistakes I'd made last time, I carefully laid out the pattern onto merino tops, then when the felt was made and dried, made a placemat and coaster set for my girlfriend:


I wanted to make a non slip mat, a kind of trivet for small pans, using the liquid rubber or silicone that people use on the soles of felt slippers. I couldn't find it, so thought I'd try this non slip rubber mat instead
      

It works really well. I had planned to machine stitch it on to make sure it's secure, but it wouldn't go through the machine :) It feels secure with blanket stitch, though.

I have a photo tutorial on flickr for how to do blanket stitch if anyone is interested