Monday, 24 June 2013

Tutorials and E-Books

I feel bad for neglecting my blog, but I really haven't had the time to do anything but work on my Fimo tutorial lately. I didn't think that would make a very long or interesting post so I thought I'd do one about what goes into writing tutorials or e-books. Looking at a really good one, you'd be forgiven for thinking that it's pretty much just getting someone to take photos while you go through the stages, or at the most, stopping to take photos if you're doing it alone. Then just adding some text to the photos in Word. Ah, if only it was that simple :)  Sometimes the shorter ones can be straightforward if it all goes well, but even then there is usally lots of photo editing,  cropping, resizing, etc. and rewrites of the text.
So, what does happen? Well we probably all do it a little differently, but usually I start off with a rough idea, a few things jotted down, then write a brief outline of what I want to include.


I'll type this out onto Wordpad, then start to give it more definition, separate it into sections then add info about the content I want in each section. I usually do a copy of this new outline with a list of all the photos I need to take for it or sets of photos, then print it out and start on the photos.


I'll probably re-print the list quite a few times as I work through it and change my ideas. I like to keep a notebook close by when I take photos because I usually end up with ideas for something else I need to include or an idea that will help make another set work better. Also it's good to take notes about what you're doing in the photo and at certain stages because it will help to explain the process more clearly.


Even when I'm not actually working on the tutorial, something will pop into my head, so I usually end up with lots of loose pieces of paper with little notes on. It's like one idea inspires others and you can't see how you can leave something out without it seeming incomplete. I thought from the original idea for my Fimo tutorial it would be several pages long and just take a few days to do with careful planning, but by the time I wrote down my outline it was already turning into a mini e-book!


Once all the photos have been taken, the most laborious part I find, is going through all the photos...deleting blurry ones first then going back and looking through the rest carefully to choose the final ones. And if you've ever taken photos of felt or fibre, you'll know it usually takes a lot of photos to get the one good shot you need :) I then usually make duplicate folders for resizing. It isn't unusual for me to have 4 duplicate sets all at different sizes.


When it comes to the writing, I usually start by simply describing the process trying not to overthink it, and use the photos to illustrate this. Then I pester my girlfriend to read it through for me, it's really good to get the opinion of someone who hasn't tried what your tutorial is about, they can ask all the questions you need to answer but might have missed. Once the first draft is finished, I'll probably ask Ann, Ruth and Karen from the studio site and Lyn from rosiepink to read through too, it's good to make sure it's understandable to people all over, and that there aren't any words or phrases that are unfamiliar. It's strange the words we take for granted that are often questioned. Once I'm happy with all the words and pictures, I work on the layout. That's where the duplicate sets of photos come in, if a photos used in the tutorial only needs to be small and doesn't show any detail, using photos of smaller dimensions and file size can reduce the overall file size of the document and subsequent PDF.

I'm just past the first draft stage of my Fimo tutorial and ready to start work on polishing the words and working on the layout. I keep getting more ideas for things to include though!


Wednesday, 12 June 2013

Fimo and Computer Problems

I mentioned in my last post that I'd started working on a Fimo tutorial. I thought I'd have it finished now, but it hasn't been as easy as I thought. After all the nice cloudy stormy days that weren't great for photos we've had about 2 weeks of non stop sunshine, and when I say non stop, I mean about 17 very long, hot hours a day :( I never have much luck with photos at this time of year as it is, the light isn't sharp like in winter, but for some reason it seems even softer than usual. I ended up re-doing my photos about 4 times.

 Then my computer died. It temporarily revived for a few days and I managed to copy all my photos onto dvds. I'd started on the editing when it died for good about a week ago. I managed to borrow a computer for a few days, so I did manage to organise the  2,000+ photos into folders and start sorting through them at least. I set my new computer up over the weekend, took about 2 days to find out where things are hidden (Windows 8, I thought Vista was bad!) and made a start on writing the tutorial and lightening and cropping the final photos. I have the intro and first part done now. Only about 7 more parts to go!
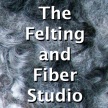
This was the piece I showed part of last time, that I dropped the camera on, it has been baked.


I had some spare pieces of clay left over from the demonstration pieces so I had a play around and made a few things just for myself. This is a pendant, it's resting on a glass pebble to catch the light.


I used some of the leftover pieces together to make multi coloured pieces, this is a heart shaped button.


I made quite a few buttons, you never know when you might need one, I might have to do a few more though, I have a pile of purses that would look good with buttons made to match.


What projects have you been working on lately?

Wednesday, 29 May 2013

Coppery Felt and Fimo

Do you remember the coppery bronzey felt piece I posted about last month? I cut that up recently and started to make a glasses case and small coin/card purse out of it. I have so many cut out or part made up items at the moment, I think I'll be working on them all year :)  I did actually finish the glasses case though. This is one side of it:


And this is the other side:


I used some gorgeous hand dyed cotton perle 5 from Rainbow Girl on etsy. The variegated colours work perfectly. I also managed to do quite a lot on the purse. I managed to sew it all together already.


I still need to choose the right button, which always takes forever, and sew the buttonhole. I'm glad I got the gorgeous ribbon on the top of the front flap.


I've also been working on a Fimo/polymer clay tutorial the last few weeks. Taking photos has been harder than ever, it's been really dark, stormy and rainy, which is nice, but not good for taking photos. We did get a few really bright sunny days, so I worked on the opposite side of the house to the sun and managed to get a lot done, or so I thought. When I downloaded the photos, what looked good when I set up a shot, didn't look good once hands were in the photo! I thought Monday would be perfect for working outside, it was bright but cloudy, but also really windy, so back indoors. I did get quite a few good photos all in all, including this one, which captures perfectly my attempt to get rid of the huge dent I caused when I released the camera from the tripod without holding it first!


And here's a sneaky peek at one of the other pieces I worked on:


I'm nowhere near finishing it yet, but when I have, I'll put it for sale on etsy, it won't be expensive, but I want to put as much in it as possible, so if anyone has any ideas, suggestions or requests, if it's something I know about, I'll do my best to include it :)

Thursday, 23 May 2013

Help Finding a Craft Market Please? And Denim Notebooks

I'd like to give selling at a craft market a go and would like to find one that it is cheap to book a stall for the day and easy to get to from Manchester City centre. I don't have a car, but I do have a granny trolley  :)  so I'm quite willing to lug that around by train or tram. I heard about the Holme Street Arts centre in Hebden Bridge, £5 for two 6 foot tables sounds perfect, but they haven't replied to any emails :(

If anybody knows of anywhere, I'd be really grateful to find out about them, thanks :)

This week, I made a couple of notebook covers from denim offcuts.  I wanted to make one with a really 'worn' and 'used' look to it, so I chose pieces from where pockets had been taken off, and piecs from the seams and hems. Once I'd torn strips the size I wanted, I removed the extra threads and then sewed them onto a base piece of denim. Then I added a delrin clip so I could close it.


For the second one, I wanted a slightly less 'scruffy' look, but didn't want it too neat, so I used strips torn from where a pocket was taken off, so I'd still get some darker patches.


I also added a delrin clip to close this one too.


I did like the look of it, but it looked a little bit too 'neat' still, so I put it in with a load of laundry then hung it in the sun to dry:


I think this looks much better now that the frayed edges are softer.


I'd like to apologise in advance for not commenting on flickr photos. The new changes are really not good for me. I have dodgy vision and the new 'design' is a violent visual onslaught for me, it gives me a headache to try to use it and causes my vision problems to get worse. So I probably won't use it much until they change it back or I'll go to ipernity with everyone else.

Friday, 17 May 2013

Mixed Media Book Cover and Camera Case

As much as I really liked the mixed media piece that I made last week as it was, I did want to make something out of it. I made sure the piece of fabric I worked on was big enough for a book cover, but the finshed piece was too thick for that. I turned it over, folded it, measured it, looked at it, thought about it, then decided I could make a book cover out of it if I cut it and used different felt for the inside flaps. So, more measuring, hunting for felt and sewing of felt to fabric. This is what the inside looked like before I'd quite finished the bottom edge:


And, this is what it looked like once all the edges were finished:


I'm not sure whether I prefer it with the red part on the front:


Or whether I like the blue better:


I had quite a good sized piece left over, and I actually really like the green part the best, so I thought I'd use it for a gadget/camera/phone case. This is one side:


And this is the other:


I really enjoyed making the mixed media piece and the cover and case, and I don't feel so odd for saving all the tiniest bits of felt scraps 'just in case' now :)

Wednesday, 15 May 2013

Mixed Media Piece with Felt, Fibre and Fabric

Late last year, I did a post talking about sorting out my felt scraps (actually, I think it was mostly moaning about bureaucracy) and putting them in 'categories' depending on size. I recently went through them again looking for pieces big enough to make bookmarks, and started to wonder what to do with the really small pieces. They are the piles at the bottom of this photo. Some of the pieces on the left are about 2 inches long and a quarter of an inch wide–really small. I wondered how it'd look if I just pushed them close together on top of a piece of fabric and sewed them into place. So, I tried. I kept to similar colours and added some pieces of fabric because I liked how the nuno felt pieces looked. I also added some art yarns for a bit more texture. This is it when I'd finished two thirds of it:


This is a a bit closer:


I originally planned to do the bottom part in lighter blues, but I had some gorgeous green shades, and thought this would look better.


Looking at it from a different angle:


The texture is really nice:


And of course, a Supermacro close up :)


Thursday, 9 May 2013

Purses

I've done a little bit more work on a couple of the purses I started. I'd already sewn up one of the slubbed white ones, and now I've added the button and button-hole. I thought doing large-ish blanket stitch around the button hole would suit the colours and style of this purse.


I used some slubbed wool I bought quite a few years ago to make the felt for this. I added some extra threads and bits of silk to the felt. I can't find a photo of it, but this piece is very similar, and this is a close up of the texture.


I used a cream vintage button, and kept the natural uneven edges again for the back pocket.


The other purse I worked on was one made from a piece of felt and squares of silk paper. It was one of my favourite pieces, the silk squares are so shiny. I'm still undecided about the button, I'm thinking of using this vintage one:


This is the back:


And the inside, I like these purses with two pockets because you get to see more felt than on the zipper ones: