Showing posts with label felt bag. Show all posts

Saturday, 3 September 2016

Felt Collage Bag

Over on The Felting a Fiber Studio we like to have Quarterly Challenges. In April, Ann issued her challenge for the 2nd Quarter, all about re-using or recycling offcuts or reshaping/re-imagining discarded pieces etc. It took me a while, but I finally got around to doing the challenge. One thing I like more than colourful felt, is lots of colourful felt! So, when I have a nice collection of offcuts, I like to put them together in a collage and make something out of it. I'd been wanting an 'alternative' bag to my little drawstring bag for a while now, and I've got a canvas satchel which I really like, but I wanted something a little bit smaller, so I thought I'd go with a smaller version of that. I worked out the dimensions for the length and width I'd need it, marked out where the front, back and flap would be, then pieced all my strips together:


The middle section with all the nuno pieces would be the back, I positioned them there because I know from experience that felt, especially Merino felt, can bobble/pill easily when it rubs a lot, like bags do around the hip area. When I trimmed the edges and folded it into shape, I realised the front flap was a bit too long to add satchel straps, so I went with a magnetic closure. This is what it looked like from the front when it was finished:
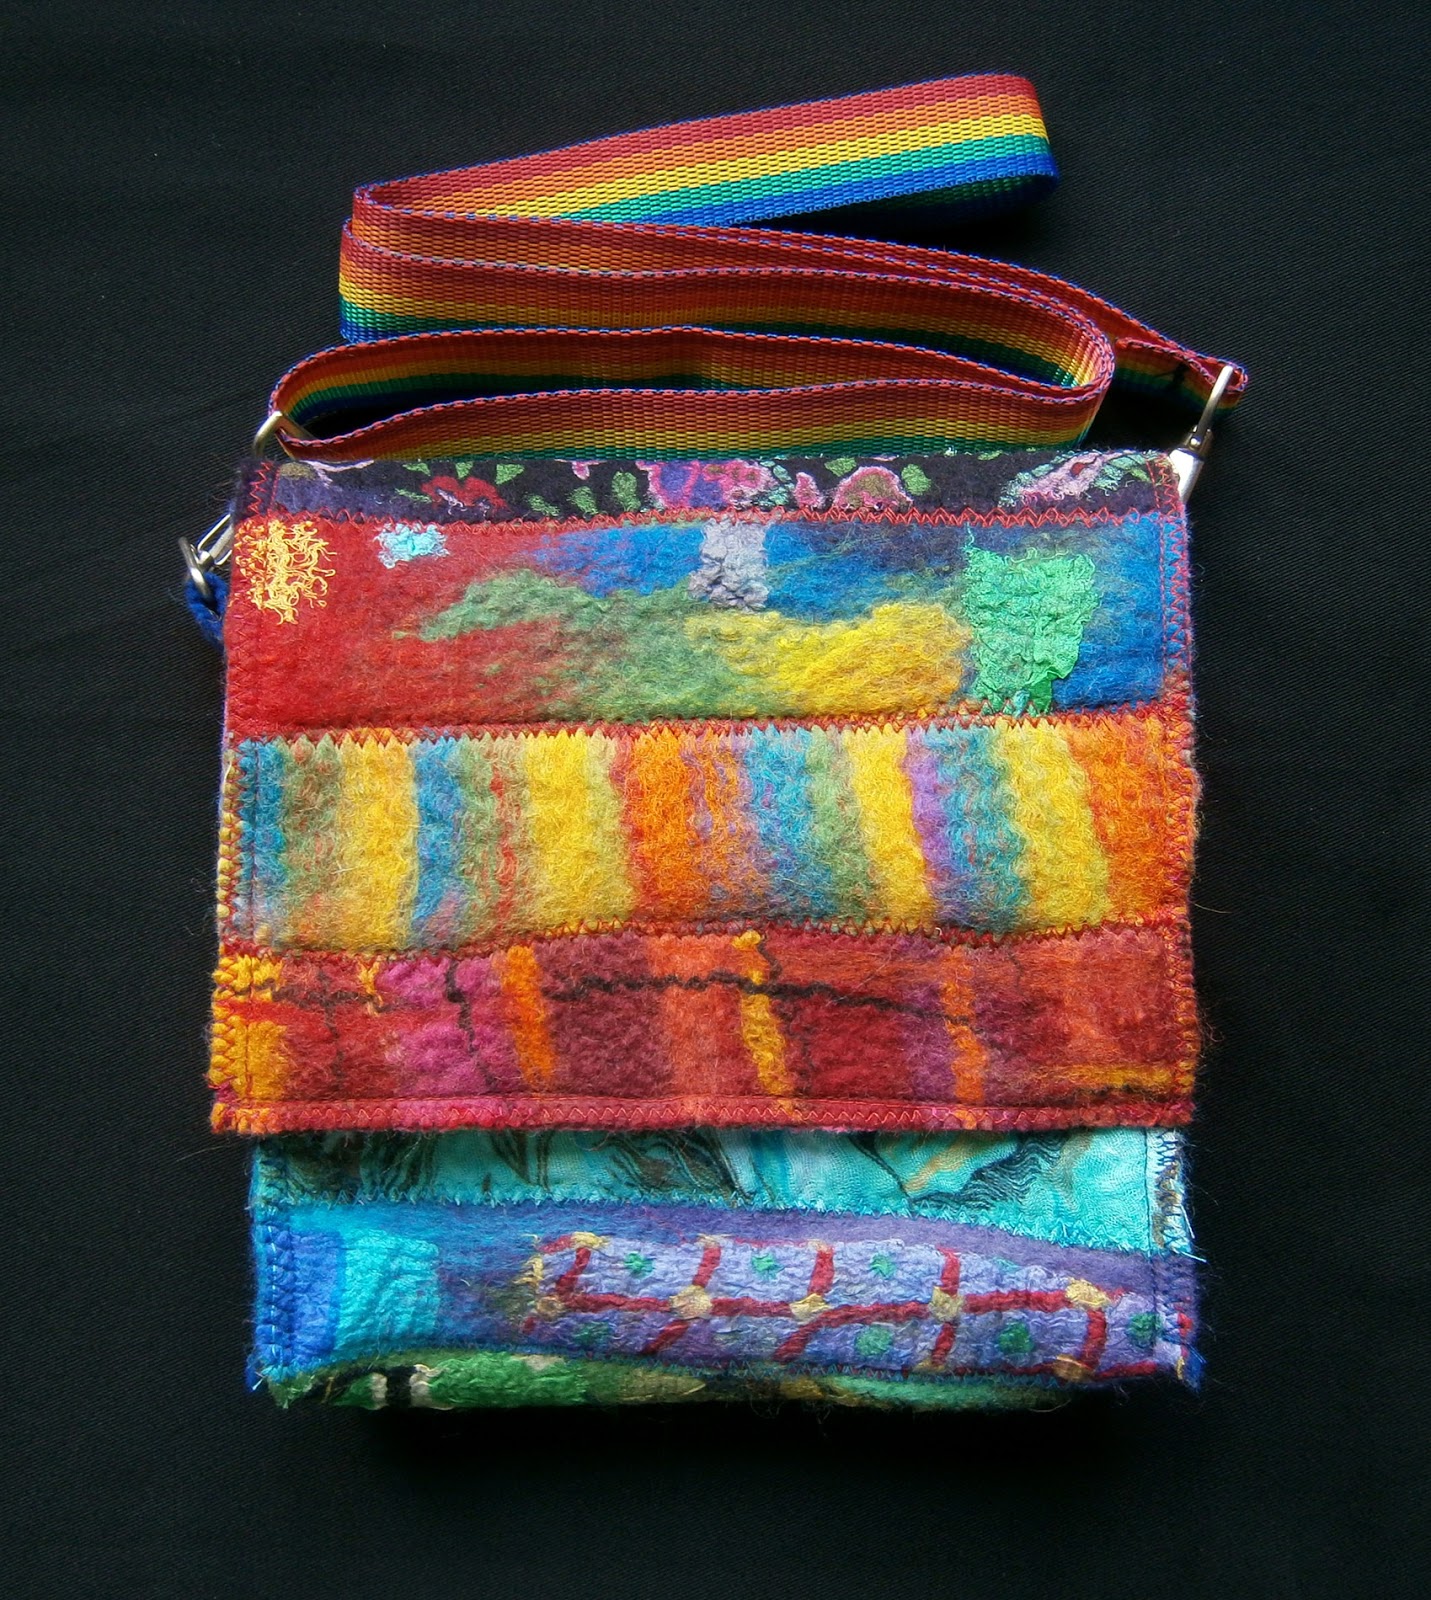

This is how it looks when it's open:


This is the back (with the front flap open):


For the side panels, I tried quite a few felt pieces, One which looked really good was a piece I'd made from woven pencil roving, but I knew it'd be too thick once the hook straps were added, so, and I don't know why this is still hard to do after all these years, but many will understand, I cut up a piece of nuno felt I made a while ago. I'm not sure I ever showed it because it's blue and I have a hard time taking photos of blue, but here's one end of it:


I cut strips for the sides, and thinner strips to make the straps to hold the bag hooks in place:


I got the findings from another bag I bought from a charity shop just for them. I recently bought 10 metres of rainbow webbing with a bag in mind and it went perfectly with this bag, I even got the findings attached the right way around the first time!:

For a guide to using fabrics in felting, check out my e-book, Beyond Nuno :) 

Monday, 31 March 2014

Drawstring Felt Bag

My girlfriend bought me a bike a couple of months ago and a big sturdy lock for it. There's nowhere to attach the lock to the bike though, so I thought I'd make myself a drawstring bag just big enough for carrying the lock and a few tools. The first bag I made turned out a little too small and a bit thin on the bottom so I've put that to the side for now. I used a bigger template for the next one. I started working inside out and laid out some pieces of silk and cotton gauze in shades of black and white for the front. I was just going to use black Merino for the top layer, but compared to the black, the silk looked blueish so I used some dark 'midnight' blue Merino aswell. This is how the front turned out after felting:


On the back I started with a piece of black silk chiffon, I thought it'd help reduce pilling (bobbles) if the bag rubbed on my back while riding. It really sunk in and isn't really visible unless you look really hard! I used some grey merino with the black for the back.


I wanted to keep the natural top edges, but it seemed simpler to cut it straight across for adding the webbing I wanted to use as a channel for the cord. I cut the bag at the top at each side, slightly smaller than the width of the webbing I was using, then I sewed the webbing on with the machine, leaving each end open. You can see from this photo that I used some scrim for a lining on the bag.


I blanket stitched along the top edge to make it look nice.


I'd originally planned to use eyelets at the bottom for the cord to go through, but after looking online I had a choice of spending a small amount of money for a few eyelets and a little plastic kit, or a large amount of a money for a really sturdy metal looking kit and about 400 eyelets. I'm not planning on making that many bags, so I decided to just cut the holes I needed and blanket stitch around them :)


I attached the cords so that the shoulder straps were also the drawstring closure. I used spring toggles so that I can shorten the straps too in case the bag hangs low while riding.


And this is what it looks like closed. I must admit, I was surprised how well it turned out!

On The Felting and Fiber Studio, Ruth challenged us to make something inspired by Jackson Pollock. I thought of many things to do for this, one idea was to do wool and wire sculptures based on some sculptures Jackson Pollock dabbled with. I thought about 'action painting' some silk, but in the end, I thought I'd do something based on some works of his that weren't action paintings. They had large areas of coloured shapes, this is a good example. I thought I'd 'modernise' it a bit though and use brighter colours and silk and gauze pieces. And since I was enjoying making bags, I thought I'd use my idea and make a bag at the same time. The bag turned out great! The design though, was a little bit bright, and really, not in the slightest like a Jackson Pollock painting!

I need to get some nice webbing or braiding for the cord channel, but I'll show the full bag when it's finished

Wednesday, 17 April 2013

Grrr! Buttonholes!

It took me a while, but I finally finished the two purses I was working on made from felt with nuno felted strips of cotton gauze. I don't like doing buttonholes, they're so small and fiddly, so I put off doing them. I could practise with the sewing machine, I suppose, but I think I'd just make a mess of it :)  I can't remember now which was the one I first started working on, but this is the first one I finished:


Where possible, I kept the natural edges of the felt. I'm sure to some people this makes it look 'wonky', but I prefer 'unique' :) I bought quite a few new embroidery threads recently, so I had lots of colours to pick the right ones for sewing the different parts.


It actually turned out a lot bigger than I thought, and my chunky camera fits into it! Plenty of room for lots of cash ;)


This is the second one I finished. It's slightly smaller than the first one, but still my slimmer camera fits in easily. They both look very similar to each other, the biggest difference being the natural edge on the flaps. This is the back, with the flap open:


As much as I always want to keep everything I make, I often find it hard to use things I make. It sounds silly, but I hate to 'waste' things, it's that same kind of feeling you get when you have a nice new notebook or journal, and don't want to spoil it by scratchy handwriting and wonky sketches. So, rather than stockpiling things 'too nice to use' in a box, I'm going to put them on etsy. The first thing I listed was a shoulder bag I finished earlier this year:


I made it using spare pieces of felt and offcuts that I saved, and a gorgeous piece of fabric to line the inside flap. It's a flat 'passport' style bag and fits a camera and coin purse comfortably.


I keep being told I shouldn't feel embarrassed or awkward about self-promotion, so if you're interested in either of the purses, the bag or maybe you were thinking of buying a handmade notebook cover or camera case, please visit my etsy store :)  The bag is already listed and once I've measured the purses and weighed them for postage, I'll add those too.
And if you don't see exactly what you want, I'm happy to take commissions for custom orders :)

Wednesday, 23 January 2013

Finishing Projects

I’ve been trying hard with Ruth’s Daily Dose of Fiber challenge, but so far that mostly consists of me rewriting the same list each day :)    I have managed to complete a few projects recently though. The first one was a small shoulder bag I started a while ago when I was using my felt offcuts. I think these kinds of bags are known as ‘passport bags’, it’s big enough to fit a camera and coin purse in. I had some nice fabric that I salvaged from a worn out camera bag, so I used this on the inside flap. It might look familiar because I took photos of the magnetic closures for a post not so long ago.
 
I covered over the tops of the magnetic closures with felt--craft felt on the inside and a nuno felt offcut for the front, before sewing the sides together--that’s usually something I’d forget to do! 


Once it was all sewn up, I finished around the edges with blanket stitch in the same maroon colour I’d used for sewing. Another project I finished recently was a felt placemat. I made the felt sometime last year and used a piece to make a mirror case, and cut out the placemat, but I never got around to blanket stitching the edges, so one day last week when there was about 30 minutes of light, I finished it off.


The last project I managed to complete this week was a set of two coasters for by the kettle. I used a plain piece of felt and cut an 11 x 7 inch rectangle, and a square roughly 6 x 6 inches. I zig-zag stitched around the edges then did random straight stitching, first one way, then the other. This thickened up the felt and because I wasn’t aiming for neatness, I didn’t need to concentrate hard or strain my eyes :)


My next project is to do a wool and fibre inventory. What have you been working on lately? Have you finished any projects you had waiting for a while? Do you have a list of things you want to work on?